useState
import React, {useState} from 'react'
In order to control a form, we need to talk about state. We import useState from react. Then we want to create a state variable to hold all of our form data. This will be in the NewBudget component.
function NewBudget(){
    const [formData, setFormData]=useState()
    return
}
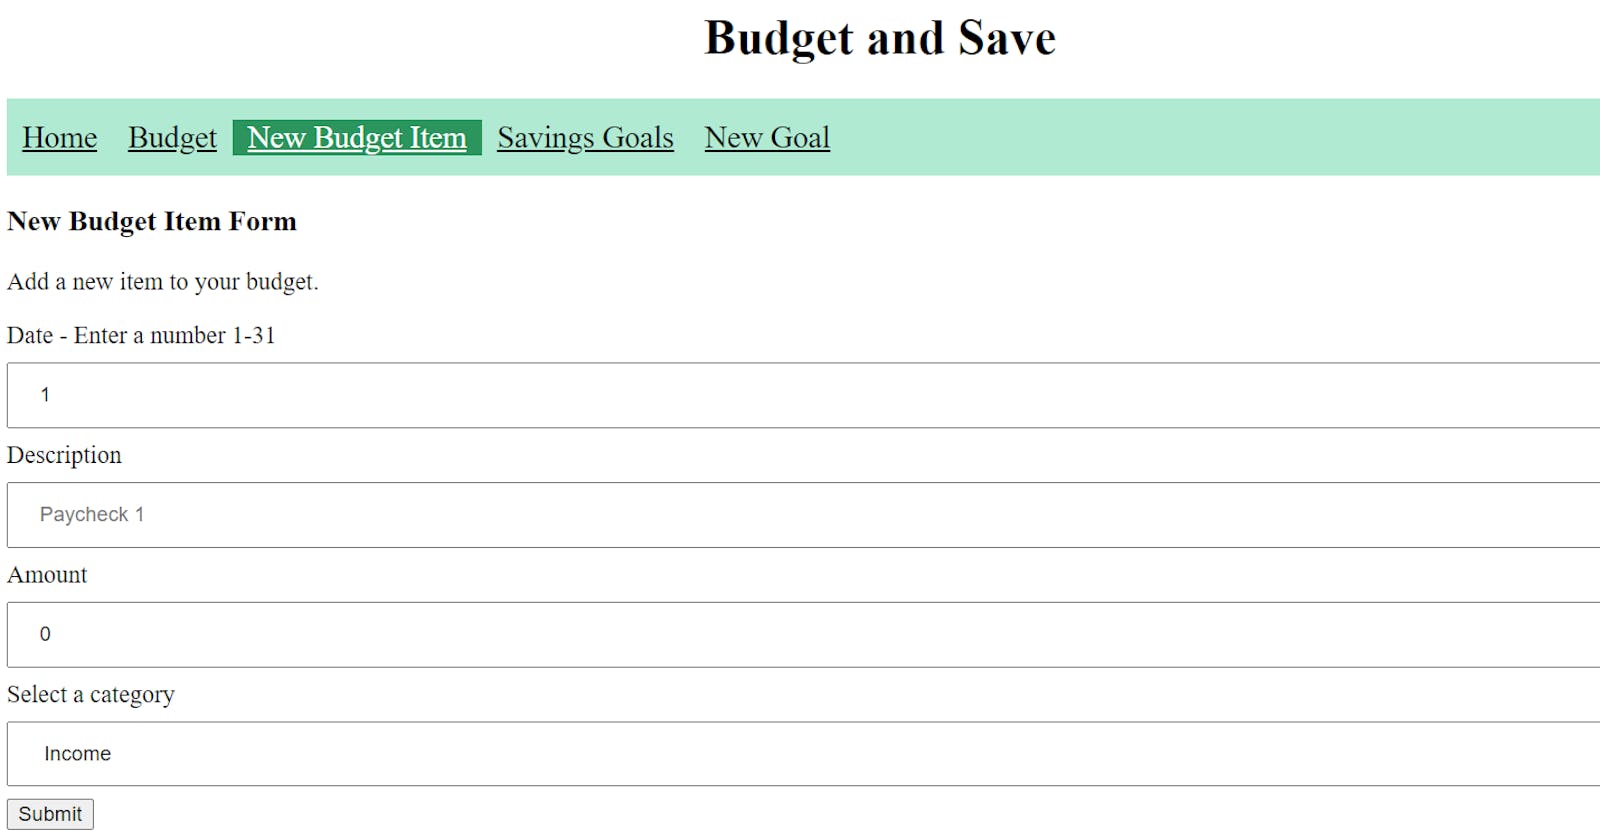
The formData needs a starting value. The form will take in four inputs: date, description (name), amount and category. So inside of useState, we will add a starting value for each of these and keep them in an object.
function NewBudget(){
    const [formData, setFormData]=useState({
        name: '',
        date: 1,
        amount: 0,
        category: 'Income'
    })
    return
}
Next, we will work on the form. We will just focus on the code for the form and then put it into the return section.
<form id="new-budget-form">
    <label>Date - Enter a number 1-31</label>
    <input/>
    <label>Description</label>
    <input/>
    <label>Amount</label>
    <input/>

    <label>Select a category</label>
    <select>
        {categoriesJSX}
    </select>
    <input type='submit' value='Submit'/>
</form>
I gave the form an id of new-budget-form and the last input will be the submit button. categoriesJSX has to do with the drop-down menu for the categories. We will not focus on this right now. Instead, let's add to each input an id, name, placeholder, value and onChange. Some have a type as well.
<form id="new-budget-form" onSubmit={handleFormSubmit}>
    <label >Date - Enter a number 1-31</label>
    <input id='newDate' pattern='[0-9]' type='number' name='date' placeholder="" value={formData.date} onChange={handleInputChange}/>
    <label >Description</label>
    <input id='newDescription' type='text' name='name' placeholder="Paycheck 1" value={formData.name} onChange={handleInputChange}/>
    <label >Amount</label>
    <input id='newAmount' type='number' name='amount' placeholder="" value={formData.amount} onChange={handleInputChange}/>

    <label >Select a category</label>
    <select id='newCategory' name='category' value={formData.category} onChange={handleInputChange}>
        {categoriesJSX}
    </select>
    <input type='submit' value='Submit'/>
</form>
name: This will be the same string we used in the initial keys of the state object variable.
value: Using our state variable, we enter formData.key based on the specified input name.
onChange: A function is entered here to keep track of the input every time it is changed.
These three are the building blocks we need to control this form. Now, let's create the handleInputChange function.
function handleInputChange(e){
        if(e.target.type==='number'){
            if (e.target.value===''){
                setFormData({...formData, [e.target.name]: ''})
            } else if(e.target.name==='date'){
                if(e.target.value>0 && e.target.value<=31){
                    setFormData({...formData, [e.target.name]: parseInt(e.target.value)})
                }
            } else {
                setFormData({...formData, [e.target.name]: parseFloat(e.target.value)})
            }
        } else {
            setFormData({...formData, [e.target.name]: e.target.value})
        }
    }
The first thing to notice is the 'e' coming into the function. We did not pass anything to this function in the onChange, so 'e' will represent the event information.
The purpose of this function is to set the new form data. There are a few conditions we need to address. First, the date should only go from 1 to 31 and no decimals. Second, the amount will need to use parseFloat to account for decimals and enter a number, not a string, into the formData.
Now, the formData will update every time the input is changed. The value is connected to the formData.
One nice thing to add on submit would be to redirect the page back to the budget tab (/budget instead of /budget/new). This is done by using the useHistory hook.
import { useHistory } from "react-router-dom";
Then we add some code in the handleFormSubmit function to go to the different route.
const history = useHistory();
history.push('/budget')
Let's put this all together and see the whole component.
import React, {useState} from "react";
import { useHistory } from "react-router-dom";

function NewBudget({categories, onBudgetSubmit}){
    const history = useHistory();
    const [formData, setFormData]=useState({
        name: '',
        date: 1,
        amount: 0,
        category: 'Income'
    })
    const categoriesJSX = categories.map(categoryOption=><option value={categoryOption} key={categoryOption}>{categoryOption}</option>)

    function handleFormSubmit(e){
        e.preventDefault()
        fetch('http://localhost:3000/budget', {
            method: 'POST',
            headers: {'content-type': 'application/json'},
            body: JSON.stringify(formData)
        })
        .then(resp=>resp.json())
        .then(data=>{
            onBudgetSubmit({...formData, ...data})
            history.push('/budget')
        })
    }
    function handleInputChange(e){
        if(e.target.type==='number'){
            if (e.target.value===''){
                setFormData({...formData, [e.target.name]: ''})
            } else if(e.target.name==='date'){
                if(e.target.value>0 && e.target.value<=31){
                    setFormData({...formData, [e.target.name]: parseInt(e.target.value)})
                }
            } else {
                setFormData({...formData, [e.target.name]: parseFloat(e.target.value)})
            }
        } else {
            setFormData({...formData, [e.target.name]: e.target.value})
        }
    }
    return (
        <div>
            <h3>New Budget Item Form</h3>
            <p>Add a new item to your budget.</p>
            <form id="new-budget-form" onSubmit={handleFormSubmit}>
                <label >Date - Enter a number 1-31</label>
                <input id='newDate' pattern='[0-9]' type='number' name='date' placeholder="" value={formData.date} onChange={handleInputChange}/>
                <label >Description</label>
                <input id='newDescription' type='text' name='name' placeholder="Paycheck 1" value={formData.name} onChange={handleInputChange}/>
                <label >Amount</label>
                <input id='newAmount' type='number' name='amount' placeholder="" value={formData.amount} onChange={handleInputChange}/>

                <label >Select a category</label>
                <select id='newCategory' name='category' value={formData.category} onChange={handleInputChange}>
                    {categoriesJSX}
                </select>
                <input type='submit' value='Submit'/>
            </form>
        </div>
    )
}

export default NewBudget
There are some extra additions like the POST request. This way the new budget item will carry through to the next time this app is loaded.
categoriesJSX is shown to make an array of options to add to the drop-down menu. These come from the first component App that starts with an array of options. There is an onChange attached to the select component that is holding these options. When one of the options is selected, the handleInputChange will update formData just like the other inputs for numbers and text.
